I saw these adorable little tote bags in the Dollar Spot at one of my favorite stores (yeah, you know the one) and although I don't need any more bags, I just couldn't pass them up! There has got to be something I could make with these, right? Oh, and did I mention that they were 75% off...that's right, only TWENTY FIVE CENTS!! So, I bought these two cute little bags. 

And this is what I decided to make with the first one.
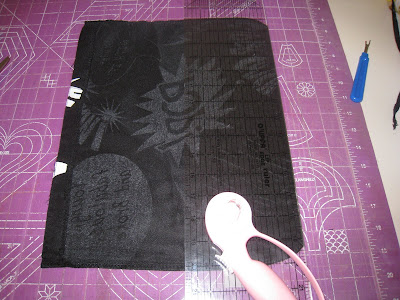
The other is still a cute little tote bag...for now.


And this is what I decided to make with the first one.
The other is still a cute little tote bag...for now.

Here's what I did:
1.) Unpick handles and take them off. This will mess up some of the stitching, but we'll fix that later.

2.) Cut off bottom of bag, just barely above stitching. My bag had rounded corners, so I also had to trim up the curves a bit too.

3.) Serge or hem bottom edge.

4.) Make a ruffle for top front. I cut out a strip of fabric double the length of the width of the bag and about 3" wide. Iron strip in half length-wise. Serge raw edges together. Sew at bottom edge to gather (set stitch length to longest possible, then set tension to really low or really high...I've done both ways).

5.) Stitch ruffle on top front of bag/tank. I turned the ruffle down at the beginning and end to curve it down and end. Does that make any sense? Just so the edge is finished, i just turned it downward. My bag had a hem at the top where the handles were sewn on. There was stitching at the very top and also about 1" from the top. I sewed over both of these stitched lines to reinforce sewing on the ruffle and also to fix the stitching that I messed up when I unpicked the handles.

6.) Find the middle of the back. Sew on 4" of elastic to the middle of the top of the back. Stretch the elastic as it is sewn on so it gathers afterwards.


7.) Make straps. My straps are (2) 12" x 2 1/2" strips of fabric. Sew each strip right sides together, flip right side out, iron, top stitch along both sides. You can also use some cute 1" ribbon for the straps.

8.) Sew straps on. Turn raw edge of strap under and sew one end to back of tank, just next to the elastic. Sew other end to front of tank. Do this to both straps. The front straps will be approximately 4-5" apart, they should line up with the straps in the back.

Embellish the tank more if you want...a cute fabric flower is always fun!!! And now you're done! That was a cheap and easy way to liven up my little girls' wardrobe!


19 comments:
That turned out super cute!!
Lynette, you amaze me at how you can find a bag and make a shirt out of it! If only I had that kind of vision!! Cute!
So cute Lynette! I will be featuring this in the future for sure!!!
This is awesome! Truly a brilliant idea and it came out SO cute! I want one! LOL!
This is a brilliant idea! I'm always amazed by people who can turn everyday objects into useful, and stunning projects!
WOW !!
Next time I go to dollar general.. I will look at tote bags !
Will never look at tote bags as just BAGS anymore !
That is brilliant and cute! And it makes me giggle. :)
you're so clever.
Okay, I've seen a lot of things "repurposed," but this is truly innovative and creative, not to mention cute!
Oh my goodness...that is so creative and it looks great on your little model. The fabric is so fun! Nice job! I just became a follower...
Cute!....I'm hosting a tutorial contest this month and you should enter if you're in the USA...there are some lovely prizes. :)
How sweet is that!
Awesome idea.
Dena
Adorable... I'm always jealous of people who can sew well. :-)
Great idea - turned out so cute
How adorable is that!!!!! Im a "bag lady" anyway and then to be able to transform it into a wearable..... faaaabulous!
sweetjeanette.blogspot.com
Wow how creative, I'd never have looked at those bags and thought tank top! Thanks for the inspiration.
I am in Awe of your craft skills! Nice job- Love it!
Cool idea!! i posted a link to your tutorial on Craft Gossip Sewing:
http://sewing.craftgossip.com/tutorial-little-girls-tank-from-a-tote-bag/2009/11/22/
--Anne
I just found your blog. LOOOOOVE IT!!!! I've put you on my reader and I will be back.
Post a Comment