
Here's my tutorial that was shared last week on Someday Crafts...thanks again Michelle! This is the perfect little ruffly tank to welcome in the warm weather...and it's super easy to make too!
Happy Spring!
Happy Spring!
Spring Time Ruffle Tank
supplies needed: tank top, 3" gathered ruffle lace, fray check, sewing essentials (machine, scissors, thread, etc), embellishments (fabric, lace, ribbon, etc)


2.) Draw a line with a vanishing fabric pen at the top of where your lace was. Make sure to make the line straight by using the lines on your mat.

3.) Draw the remaining lines on the shirt. You'll want the lace to overlap about 1" and you'll want the last strip of lace to be at the neck of the tank. The measurements for how far apart your lines will be depends on how long your tank is and how wide your lace is.

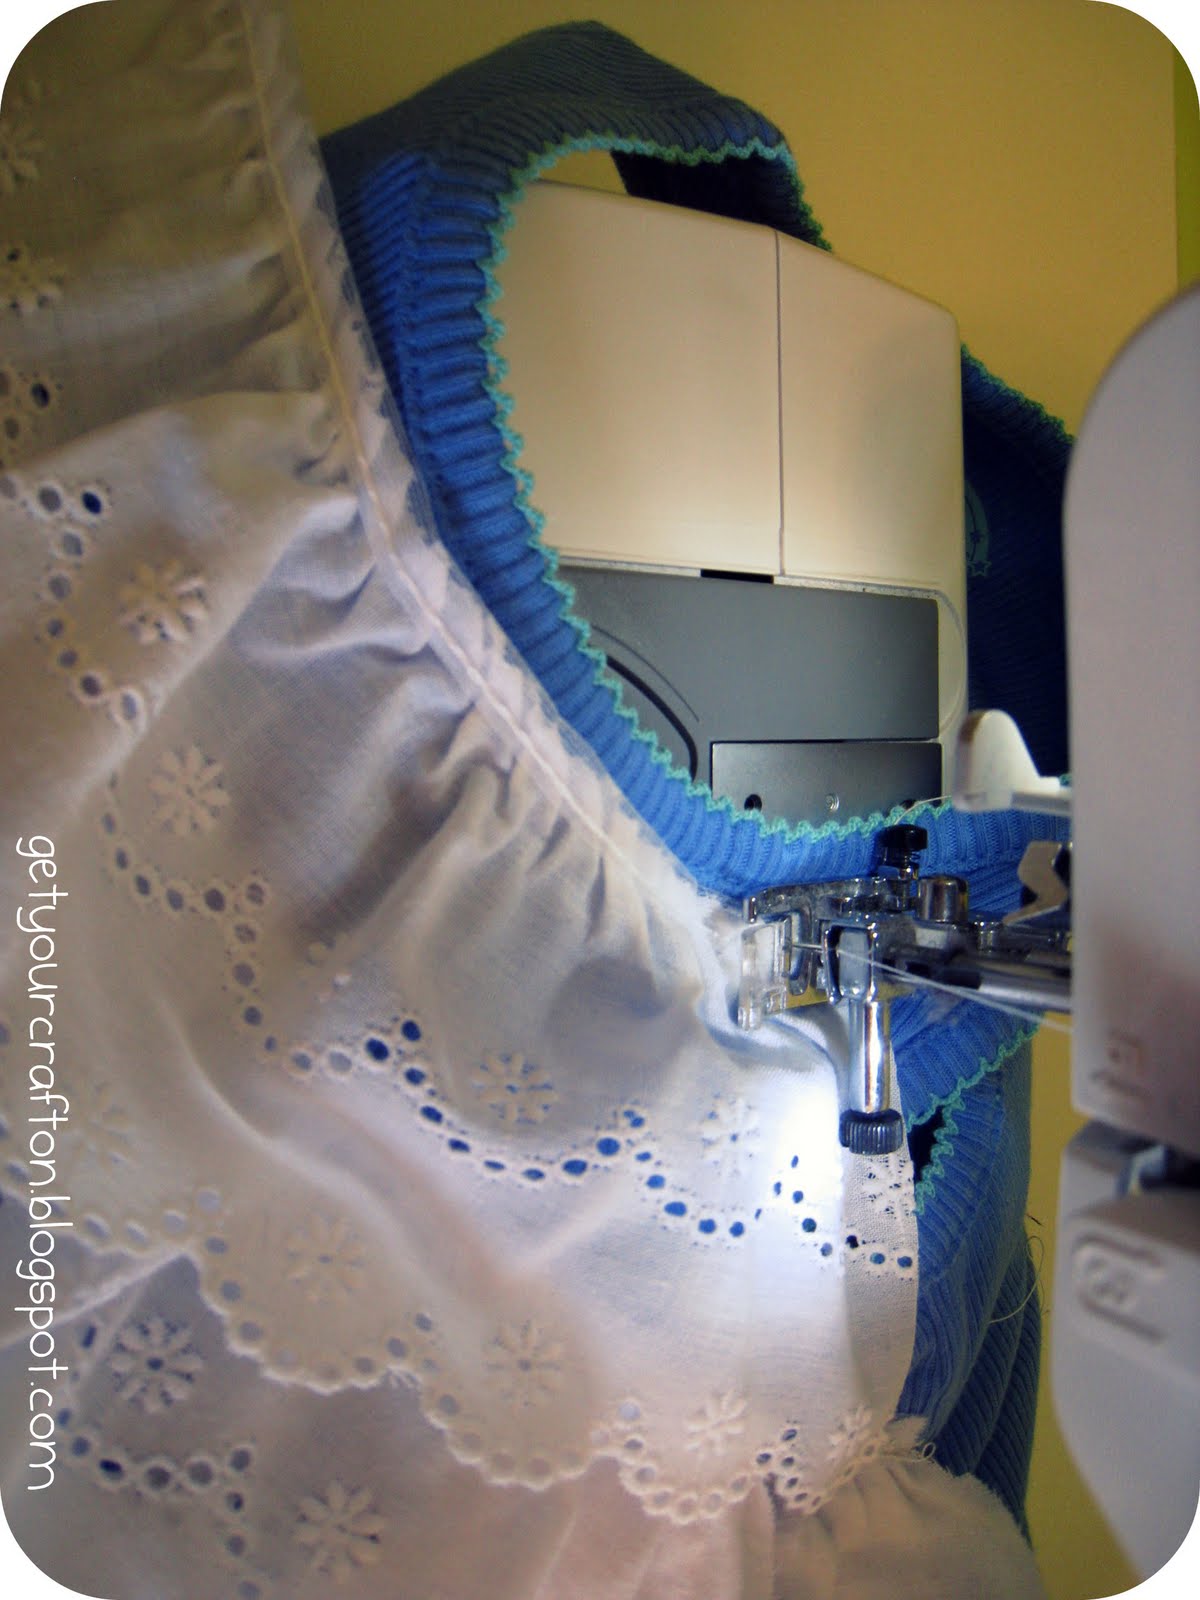
4.) Once you have all your lines drawn on your tank, take the tank and the lace over to your sewing machine to sew the lace on. Starting with the bottom, sew a strip of lace onto the shirt lining up the top edge of the lace with the line you drew on the shirt. Make sure you secure your stitching with back-stitches at the beginning and end of the lace. When you get to the end of the row, just cut the lace and finish stitching it to the shirt.


5.) Continue sewing the lace on in this manner all the way up to the top of the shirt.

6.) When you get to the neckline of the tank, sew the lace on following the curve around the neck. Once you have all the lace sewn on, go back and put Fray Check on all the ends of lace to keep it from fraying.

7.) Embellish your tank with bows, ribbon, flowers, rossettes, buttons....or whatever you want!

And you're done! Now, bring on the good weather...we're ready!
Thanks again Michelle for having me today! For more fun tutorials, come check out my blog anytime! Happy Spring!


5 comments:
I saw a bunch of this eyelet ruffle stuff on clearance at Wally World but I couldn't think of what to do with it! Thanks, now I am going to have to buy some and try this :-)
Thanks for guest posting. I forgot to email you last night telling you to post it on your site. It was awesome!
Very cute!! Thanks for sharing.
I LOVE this idea! I'll be featuring it on my blog at the end of April! Thanks for sharing!
- Sumo @ Sumo's Sweet Stuff
Precious!!! :)
Post a Comment