Showing posts with label Bags. Show all posts

Tuesday, March 22, 2011

One more TuTu Tote

One of the moms of a little girl in Brynlee's dance class asked if I could make her daughter a TuTu dance bag. Of course I said yes! I made this one a bit different than Brynlee's and I think I like it even more.


I am still sewing, but things are a lot busier since this little cutie came along. And yes, he is a boy laying on a pink blanket...oops!


Next on my list to make is a quilt for my husband's co-worker who is expecting her first baby girl.

Monday, January 3, 2011

a bag for me...um, I mean baby

I've always wanted to make a diaper bag, but I never did with my last two kids, so I thought I would make one this time!   I really like messenger bags, so this Simplicity pattern really appealed to me.  I'm so happy with how it turned out.  I don't think it's quite as orange as the picture makes it look...but it's definitely a cheery orange...I love it!

  I followed most of the directions, but did change a few things about the bag.  I put in a "hidden" zippered pocket behind the front flap for all of my stuff...wallet, phone, etc.

 I also added a little strap with a D-ring for my keys to clip to. 

And I really like my purses/bags to go across my body, so I changed the original strap to a longer adjustable strap. 

There are lots of pockets too!  One large pocket on the back, two elastic pockets on the sides, one zippered pocket under the flap, and more pockets inside! 


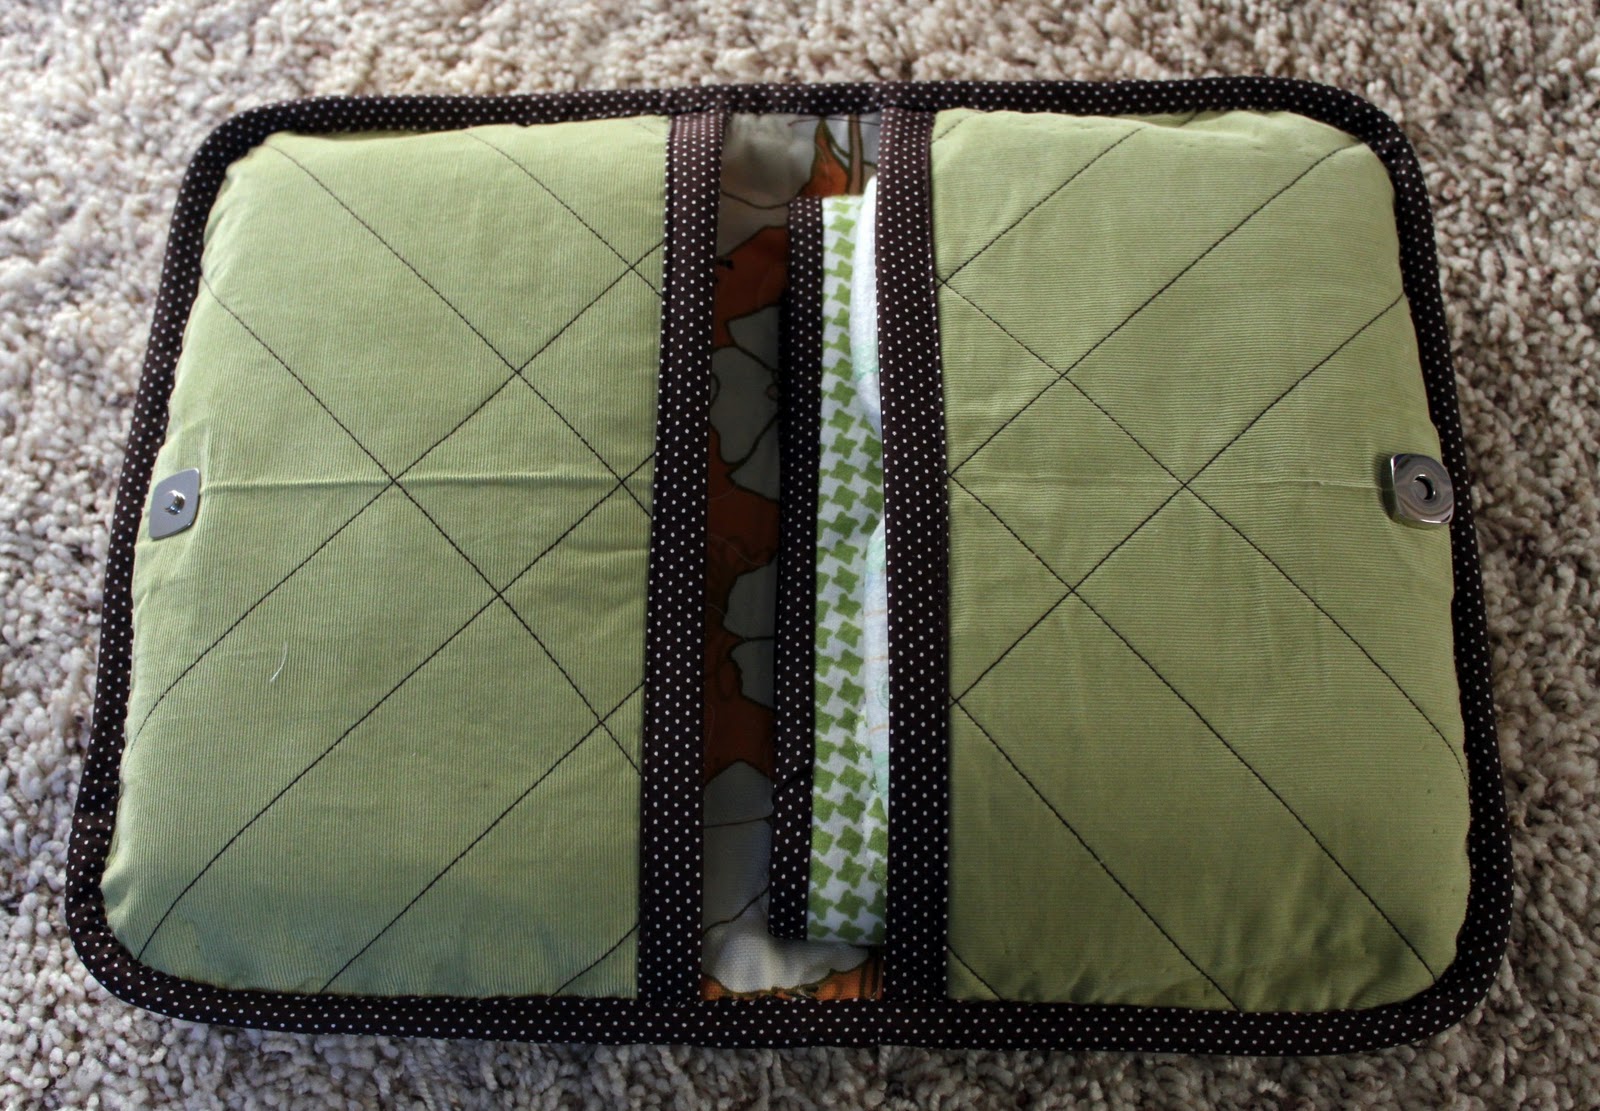
I love the fabric too!  It's duck cloth and I got it on sale for $3/yard...wahoo!  I bought 3 yards of it.  So, since I had plenty of fabric, I made a cute matching diaper/wipes clutch too!  I borrowed the pattern from my friend, Tami...isn't it super cute? 

With a coordinating changing pad with fun quilting on it.

And a cute wipes case, of course.

I can't wait to use all my new fun baby stuff!  All I need is a baby!  Do you think it's too girly since I'm having a boy?  It is for me, right?

Sunday, December 19, 2010

a dance bag for Brynlee

My daughter, Brynlee, just finished 9 weeks of her very first little "pre-ballet" class. It was the cutest thing I think I have ever seen!!!!
 

And she loved it!! So, of course I signed her up for another round starting in January...this time with tap class too! And I thought we better get serious about this dancing thing if we want her to be a star (totally sarcastic here)!  Really, I just wanted an excuse to make her a super cute little dance bag.  After looking around the internet for a little inspiration, I decided to go with the over-the-top Tutu Bag.  I made the pattern up for the tote bag, then added the fun "tutu" and blingy name (although, I had to go with Bryn, instead of Brynlee b/c I didn't have any more "E's"). 


The inside is lined with pink and black zebra print and has 4 pockets inside for her ballet and tap shoes.  The top closes with a simple ribbon bow. 


I'm going to give it to her for Christmas...I hope she likes it as much as she loves dancing!

Tuesday, November 17, 2009

Rooty "TUTE" Tuesday - Tote Bag Tank

I saw these adorable little tote bags in the Dollar Spot at one of my favorite stores (yeah, you know the one) and although I don't need any more bags, I just couldn't pass them up! There has got to be something I could make with these, right? Oh, and did I mention that they were 75% off...that's right, only TWENTY FIVE CENTS!! So, I bought these two cute little bags.
And this is what I decided to make with the first one.
The other is still a cute little tote bag...for now.


Here's what I did:

1.) Unpick handles and take them off. This will mess up some of the stitching, but we'll fix that later.
2.) Cut off bottom of bag, just barely above stitching. My bag had rounded corners, so I also had to trim up the curves a bit too.
3.) Serge or hem bottom edge.
4.) Make a ruffle for top front. I cut out a strip of fabric double the length of the width of the bag and about 3" wide. Iron strip in half length-wise. Serge raw edges together. Sew at bottom edge to gather (set stitch length to longest possible, then set tension to really low or really high...I've done both ways).
5.) Stitch ruffle on top front of bag/tank. I turned the ruffle down at the beginning and end to curve it down and end. Does that make any sense? Just so the edge is finished, i just turned it downward. My bag had a hem at the top where the handles were sewn on. There was stitching at the very top and also about 1" from the top. I sewed over both of these stitched lines to reinforce sewing on the ruffle and also to fix the stitching that I messed up when I unpicked the handles.
6.) Find the middle of the back. Sew on 4" of elastic to the middle of the top of the back. Stretch the elastic as it is sewn on so it gathers afterwards.
7.) Make straps. My straps are (2) 12" x 2 1/2" strips of fabric. Sew each strip right sides together, flip right side out, iron, top stitch along both sides. You can also use some cute 1" ribbon for the straps.
8.) Sew straps on. Turn raw edge of strap under and sew one end to back of tank, just next to the elastic. Sew other end to front of tank. Do this to both straps. The front straps will be approximately 4-5" apart, they should line up with the straps in the back.
Embellish the tank more if you want...a cute fabric flower is always fun!!! And now you're done! That was a cheap and easy way to liven up my little girls' wardrobe!


BCD Show and tell

Tuesday, August 25, 2009

Rooty "TUTE" Tuesday!!!

I hereby pronounce all Tuesdays from this day forward to be Rooty "TUTE" Tuesdays!!! There will either be a new tutorial from Get Your Craft On or I will feature some cool tutorial from a different blog on here every Tuesday! How cool is that? Well, let's get started shall we...here's the first tute!

Capri Sun Pencil Case

Materials:
6 Capri Sun pouches (washed and dried)
9-10" zipper (I used a 9" and it was just a tad too short, but I haven't tried the 10")
sewing essentials: sewing machine, thread, etc.


*don't forget to click on the pictures to enlarge them!


1.) Cut a slit on the bottom of each Capri Sun pouch and pour contents into pitcher. You can just save used Capri Sun pouches, but they will have the straw hole used.

2.) Thoroughly wash out each pouch and completely dry.

3.) Sew 3 Capri Sun bags together, side-by-side, overlapping approximately 1cm. Have the picture side be facing up. Make 2 sets of 3 bags, one for each side of pencil case. You can use a straight stitch, a double straight stitch (that's what I did) or a zig-zag stitch.

4.) Now it's time to sew on the zipper! Place the zipper right-side down on the right-side TOP of one of the sides. Line up the edge of the zipper with the top edge of the side of the pencil case. Using a zipper foot, sew zipper on.


5.) Flip zipper over and press down bag. Topstitch on pencil case side right under the zipper.


6.) Take the other group of 3 bags sewn together and place it on top of the one you just sewed the zipper on to, right-sides together. Line up the top edge of that side with the edge of the zipper. Flip over and use a zipper foot to sew on zipper to that side of pencil case.


7.) Flip that side over and press down. Topstich on that side of pencil case right under the zipper.


8.) Now finish it up by sewing sides of pencil case together. With wrong-sides together, and zipper at top, sew the other 3 sides of the case, not including side with zipper. Make sure to catch the front and end of the zipper in your stitching and make sure to back stitch at beginning and end. Again, you can use a straight-stitch, a double straight-stitch (that's what I did), or a zig-zag stitch. And that's it!!!


9.) If you want, add a little name washer for a zipper pull or jazz it up with a bunch of crazy ribbon for a zipper pull. This is the stamping set I used to stamp the name in the washer and here is the tutorial on it...so fun!


Okay, now go put some pens and pencils in your new cool Capri Sun Pencil Case and good luck at school!!!