Showing posts with label hair stuff. Show all posts

Friday, May 14, 2010

THIS SATURDAY....oh, and my new favorite headbands

Our big street festival is THIS SATURDAY!! If anyone lives in VA, we'd love to have you stop by! It is on Main St. in Warrenton. There will be TONS of vendors, food, and fun! It's a great way to spend a Saturday morning with the family. The festival runs from 9am-4pm. Tami and I have been working hard to get ready for this and we have tons of fun stuff this year...we're excited! We hope to see you there!!

And one more thing...I just CAN'T resist showing you these pictures that Jen took. AMAZING!! What a perfect little model, eh? And those headbands she is wearing are new in the shop...for a totally affordable price! So fun and fancy...perfect for capturing the perfect picture!


Tuesday, May 4, 2010

I promise I've been sewing

I've actually been sewing a lot lately, but have nothing to show for it! Well, not really nothing, but nothing fun and new to put up on my blog. I've been sewing a ton for the Spring Street Festival that we're doing on the 15th. Tami and I have been trying to get all stocked up in the Shop, so we'll be ready for the festival. I hope it's as successful as it was a couple years ago! I've also been making stuff for SYTYC. It is quite intimidating trying to come up with a themed project every week that is fresh and fun. And getting good photos of it is a whole other issue! So, I have been busy, but don't have much to show for it...yet. I did get an awesome package in the mail the other day though...yards of stretchy lingerie elastic for making headbands...so fun!  I'm addicting to making headbands!  Check out my friend's adorable baby girl in one of the headbands.  Photo courtesy of Jen.
And here are a few of my college roommates daughter's in some headbands....so cute!  You can check our selection of headbands here...we add more all the time!
And one more picture, just because she's so cute!  Photo courtesy of Leilani Photography.
Okay, hopefully I'll have more stuff to show you soon!  I promise I've been busy.  I just can't show you everything....yet. 


Wednesday, March 17, 2010

A few tutorials

A few of you have asked for a tutorial for the singed flowers. I was going to write one up, but there really is no need since there are several of them already out there in blogland. So, here are a just a few tutorials for you to check out.  There are even more out there if you want to google it!  Have fun, they are addictive!


***DON'T FORGET the giveaway below...winner will be picked on Sunday night!***

Tuesday, March 16, 2010

Trendy Hair Accessories! oh, and a GIVEAWAY!

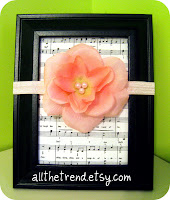
Our little shop is growing!  All The Trend has added several new trendy hair accessories. There are some already listed and many more to come (as soon as I can sit down and put them in :) We're really excited about these sweet infant headbands and funky new hard headbands. They are made with the utmost care and are priced totally affordable! Here are a few of my favorites.

Infant Headbands


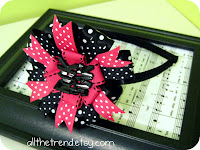
Hard Headbands


And since we're introducing something new, I thought a little giveaway would be fun!  I'll give two lucky readers their choice of any headband!  To enter, just leave a comment, with your email please, telling me which headband is your favorite.  If you want another entry, become a follower of Get Your Craft On or leave a comment telling me you already are!   Winners will be announce Sunday night, March 21st.  Good Luck!  Oh, and feel free to browse around our shop a little :)


Wednesday, March 10, 2010

Lookie what she made!


Check out these super cute pleated ribbon rosette headbands from Ashley, at Cute As a Fox. She saw my tutorial and whipped up a couple...I love the way she pleated the ribbon on the headband! I think I'm liking her's more than mine!

I'd love to see your projects if you've used my tutorials!   Feel free to send me an email with some pictures! All Get Your Craft On tutorials are listed on my left sidebar if you click on the cute little chalkboard, or up top under my header.  Happy Crafting!


Tuesday, March 9, 2010

Ribbon Flower Headband TUTORIAL

Here is the tutorial that I did for a blog swap with MaryJanes and Golashes last week.  I saw a headband similar to this one at Wally World and decided to recreate it at home.  I think it's super cute for a little girl, or also super fun for 'big' girl.   I'm totally obsessed with hair accessories lately...can you tell?   
If you try it out, I'd love to hear from you!


Ribbon Flower Headband Tutorial
 Supplies: 1/2"-1" wide ribbon, headband, felt, glue gun, sewing essentials (sewing machine, thread, etc)

*The size of the flower can obviously be adjusted depending on how long you cut the ribbon and make the felt circles.
1.) Cut ribbon about 1- 1 1/2 yards long.

2.)  Cut out two circles approximately 2" in diameter.

3.) Gather your ribbon on your sewing machine.  I like to make the tension on my sewing machine as tight as I can and the stitch length at the longest. Sew all the way down one side of the ribbon.  It will start curling up as you sew.  It will be a big curly ball when you're done, like this:
4.)  Now you're going to glue this gathered ribbon to one felt circle.  Start by folding one end of the ribbon back at a 90 degree angle.  Place an inch or so of hot glue at a time around the outside perimeter of the felt circle.  Starting with the end you just folded back, place the ribbon on the hot glue so the side that was gathered on the sewing machine is being stuck to the hot glue.  Continue doing this inch by inch around the felt circle gradually working your way towards the middle.  When you make your way all the way around the circle once, just keep going but place the glue just below the existing ribbon.  Keep doing this all the way to the middle.  You will need to untwist your ribbon as you go.  

5.) Once you've gotten to the middle, you'll need to secure the last bit of ribbon.  If it is too long, you can trim it as necessary.  With the remaining ribbon, fold the end down at a 90 degree angle, then roll the ribbon as much as you can towards the felt base.  Place some hot glue at the center of the flower and stick the rolled ribbon down to it.  

6.) You can leave it like this or add a button or jewel to the middle.  Or you can also add other jewels, buttons, tulle, or netting to it too!


7.) Attach it to the headband.  Place an inch or so of hot glue on one side of the headband and stick the flower to it.  Take your other felt circle and hot glue it to the back of the flower, enclosing the headband between the two felt circles.  
And you're done!

Saturday, March 6, 2010

Zipper Rosettes

 My friend Tami has an awesome tutorial on her blog about how to make zipper rosettes. She totally scored a bag of random colorful zippers at a local thrift store and has been having fun transforming them into super cute rosettes! Check it out HERE.

Tuesday, February 23, 2010

New Headbands!!!

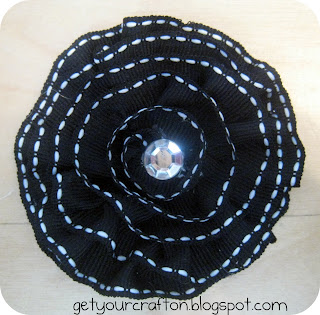
I've been having a lot of fun experimenting with different hair accessories lately! I love all the endless possibilities! When I had our little girl's night bow-making party, I wanted to make sure I had lots of variety for everyone. Whether they had little girls, older girls, or wanted to make something for themselves. Here are a few headbands that are a little more 'grown-up', I guess. I think they would look cute on anybody!!  I even wore a little flower in my hair over the weekend...completely out of character for me, but I loved it!!  If anyone is interested, I'll be adding them to our shop.

Also, stay tuned, there will be a fun giveaway later today that I'm super excited about!